


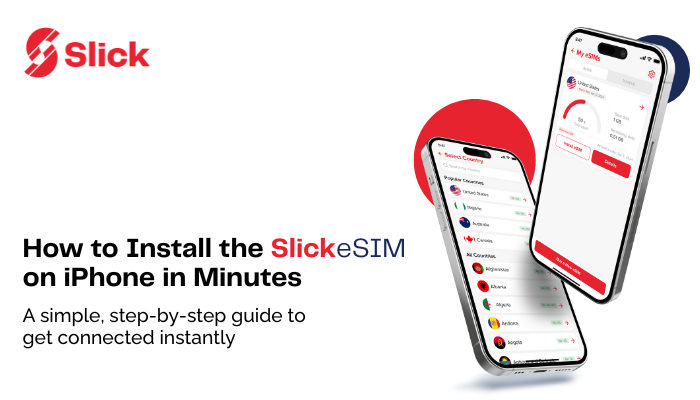
Ready to use your eSIM but worried the setup might be complicated? Getting stuck in phone settings can be frustrating, especially when you’re about to travel. The good news? Installing SlickeSIM on your iPhone is quick and simple. This step-by-step guide walks you through the entire process so you can get connected in minutes, even if you’ve never used an eSIM before.
Before you begin, download the Slick app and register if you haven’t already.
Set Up SlickeSIM on Your iPhone in three Simple Steps
- Step 1: Buy Your SlickeSIM
- Step 2: Install Your SlickeSIM on iPhone
- Step 3: Activate Your SlickeSIM on iPhone
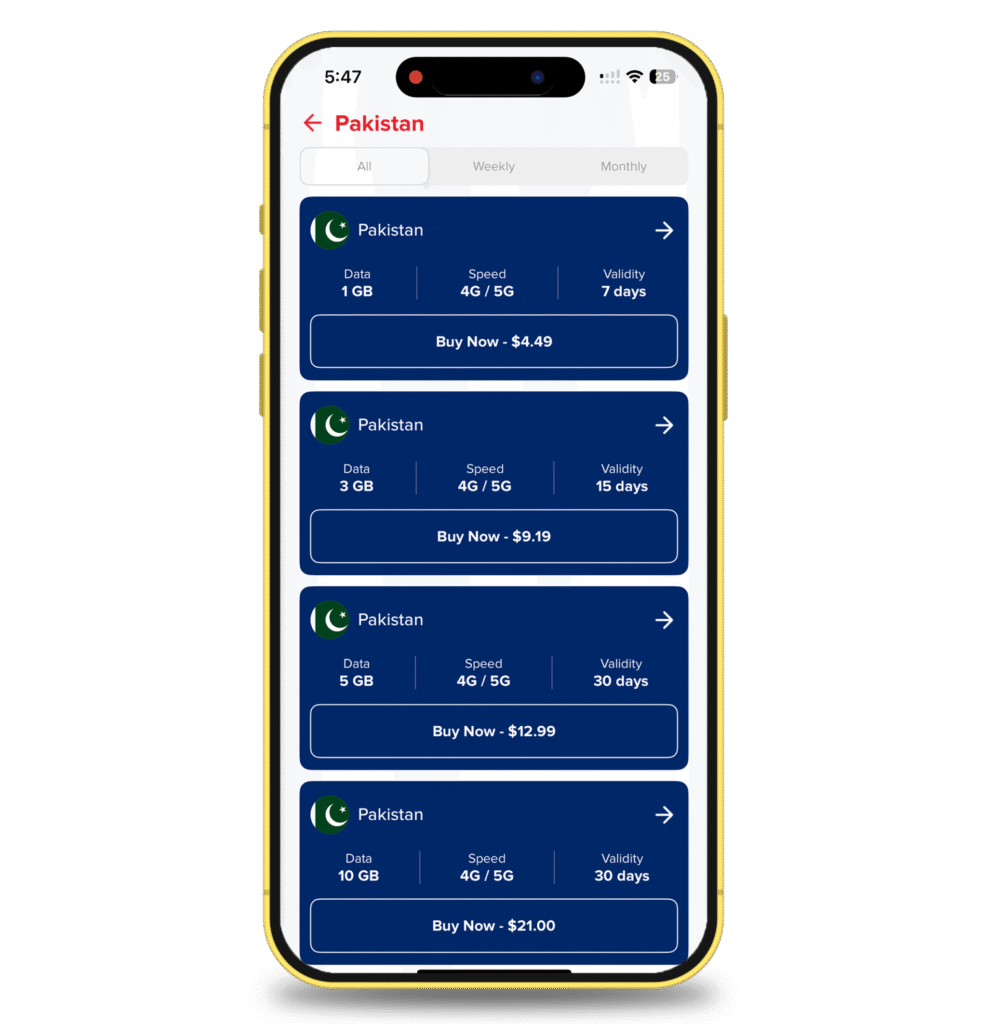
Step 1: Buy Your SlickeSIM – Step-by-Step Guide
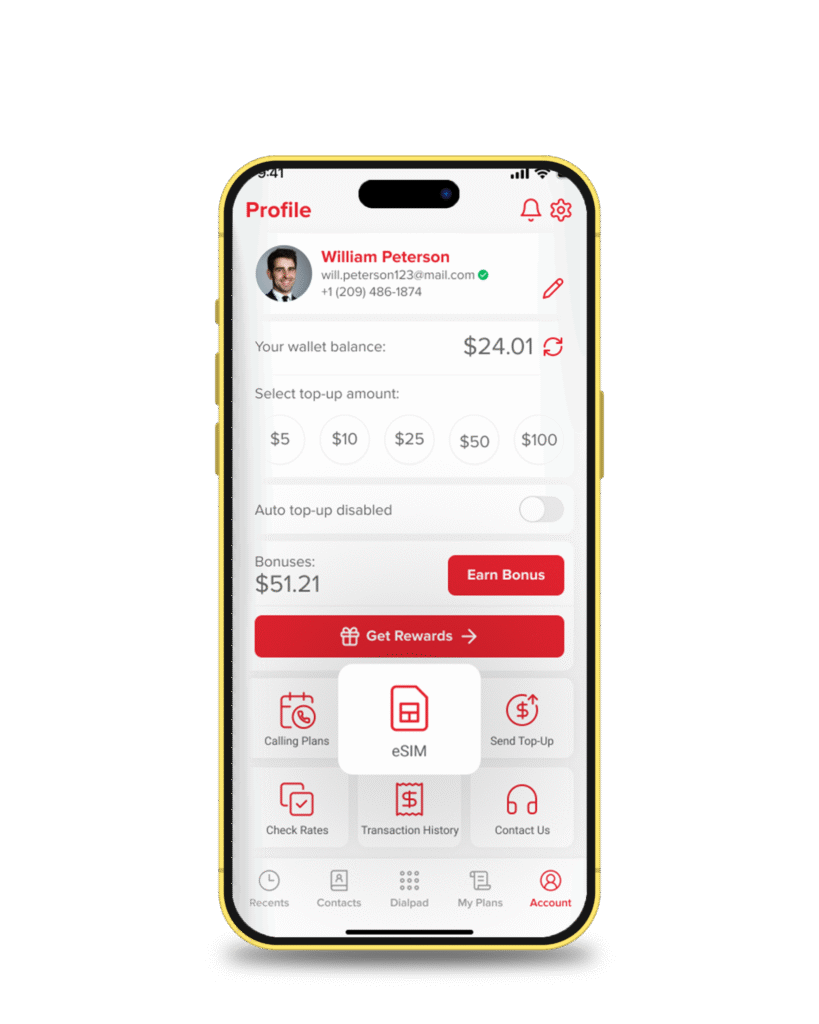
Open the Slick app on your iPhone. This is where everything begins.
1 – Tap on “eSIM”
From the home screen of the app, tap on eSIM. That’s your gateway to global data freedom.
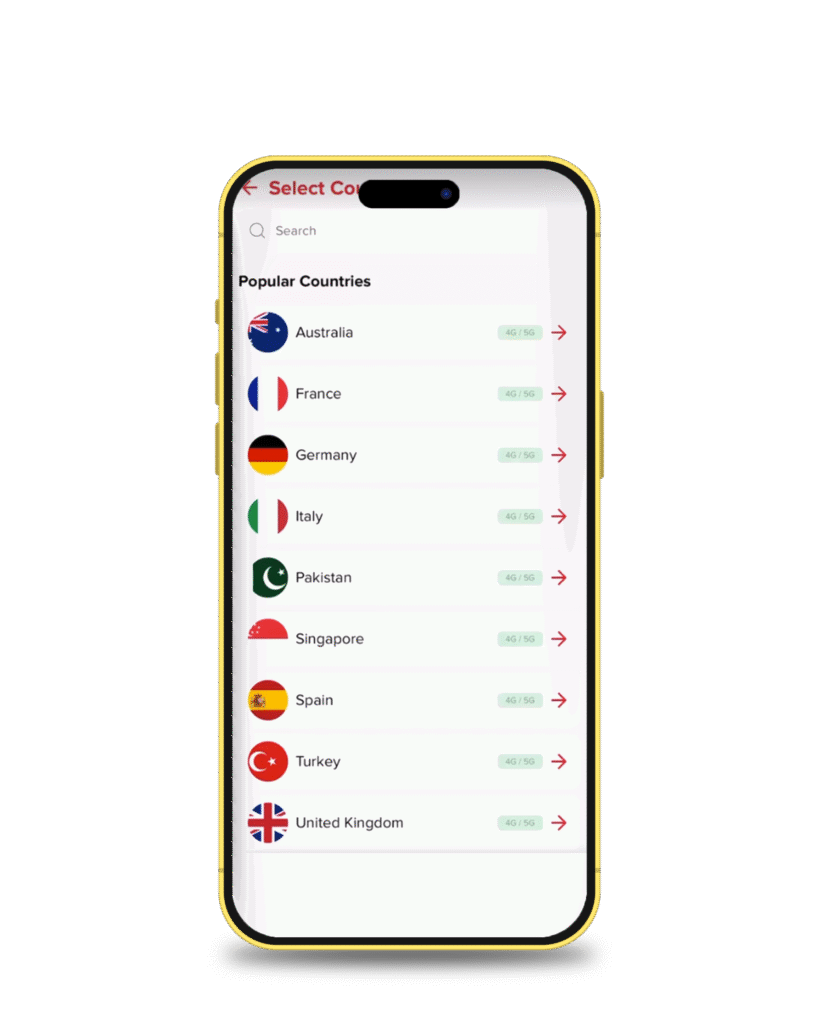
2 – Search for Your Country
Type in the country where you’ll need data. Headed to Spain? Japan? Canada? Enter it here so Slick can show you the right plan.
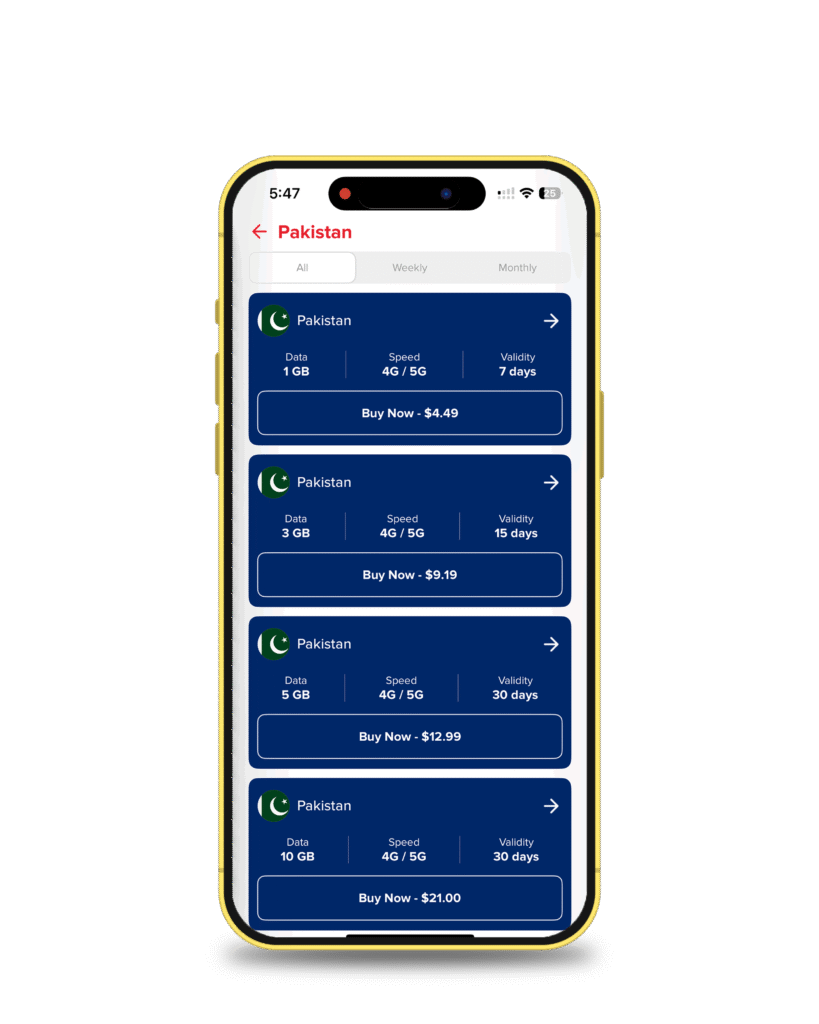
3 – Choose Your Plan and Tap “Buy Now”
You’ll see a list of options, including weekly or monthly plans. Scroll through, compare what fits your trip best, and then hit Buy Now.
4 – Confirm Your iPhone Supports eSIM
The app will remind you: not every phone plays nice with eSIM. Since you’re using an iPhone, you’re already good to go. Tick the box to confirm compatibility and tap Continue to Payment.
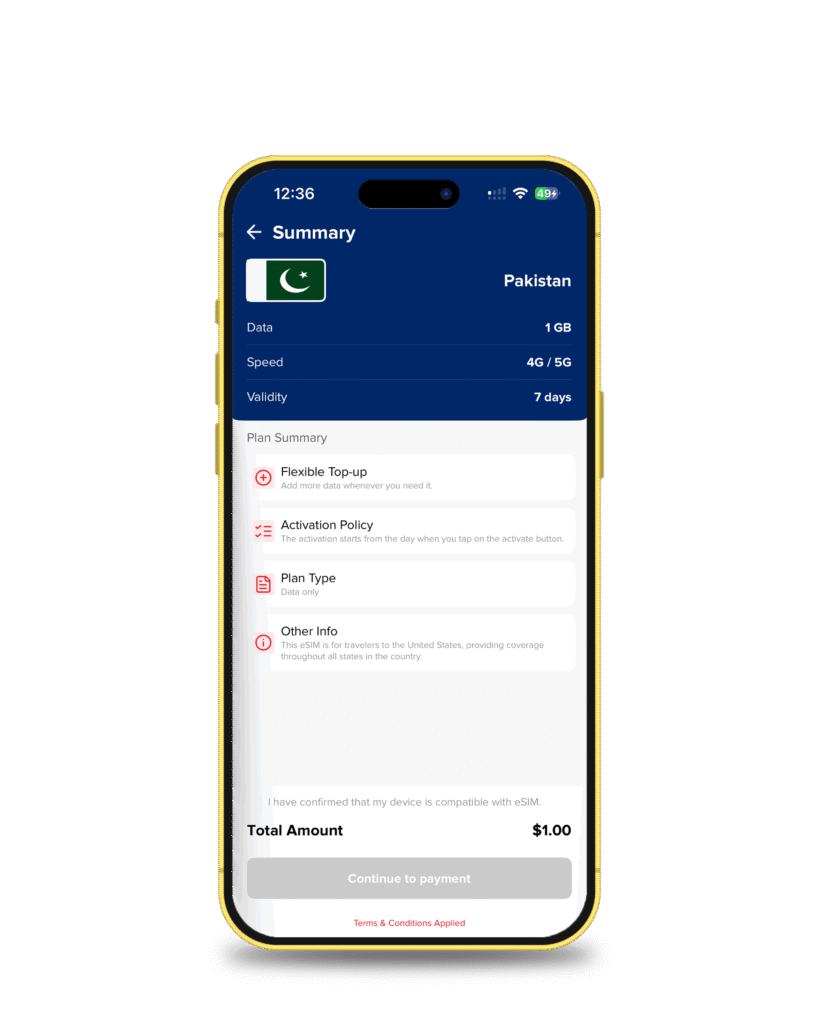
5 – Select Your Payment Method
Here you’ll see three choices:

2 – PayPal
3 – Wallet Balance (if you’ve topped up your Slick wallet already)
Pick what works best and tap Continue.
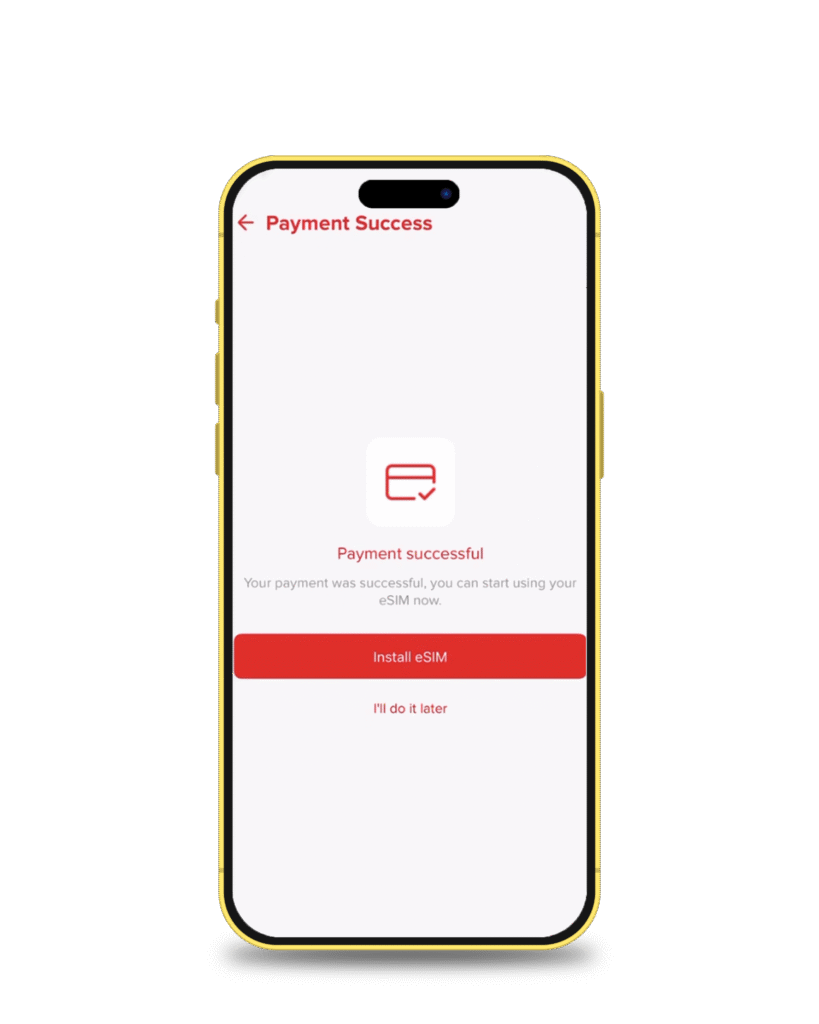
6 – Complete Payment
Once the transaction clears, Slick will flash a confirmation screen: Payment successful. That’s your green light to move on. Tap Install eSIM.
Step 2 – Install the SlickeSIM on Your iPhone
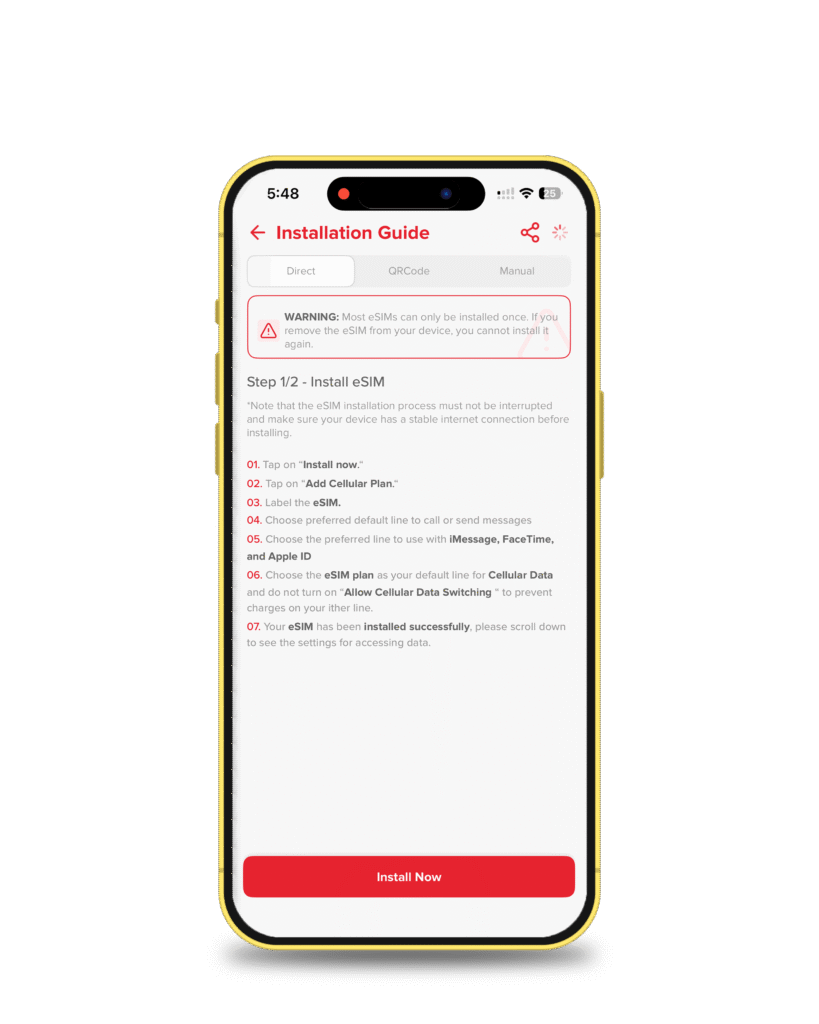
1 – Choose Your Installation Method
You’ll get these options to install:
2 – QR Code (scan a code with your camera)
- Install with the Direct Method

To activate an eSIM on iPhone Pro Max directly, tap Direct. Then, tap Install Now.
- Install Via QR Code
If you prefer the QR code method, just tap QR Code at the top of your Slick app. Your unique code will appear right away.
Now you have two easy choices:
2 – Or, pull it up on another device (like your laptop or tablet) and scan directly from there.
In a few quick seconds, your iPhone will recognize the plan and guide you through the iPhone’s screen prompts discussed below
2 – Follow iPhone’s On-Screen Prompts
At this point, Slick hands the wheel to Apple. Your iPhone will guide you through the setup.
- Activate the new eSIM: Tap Allow.
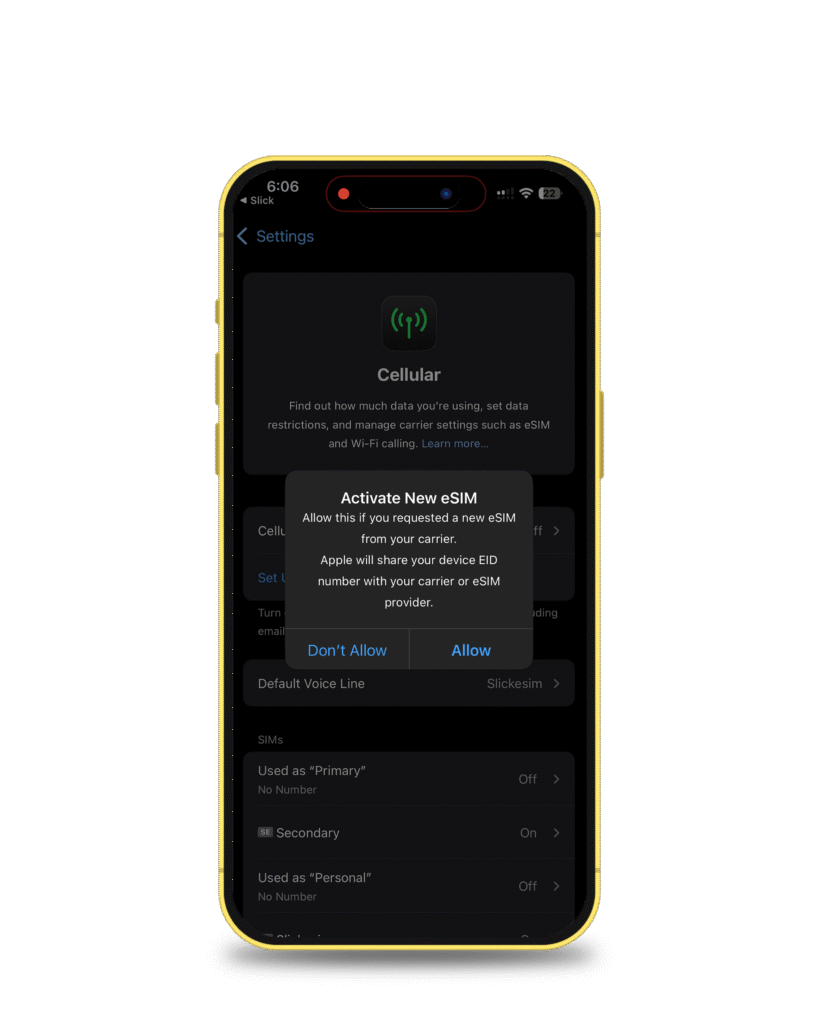
- Wait a moment while your phone talks to the network.
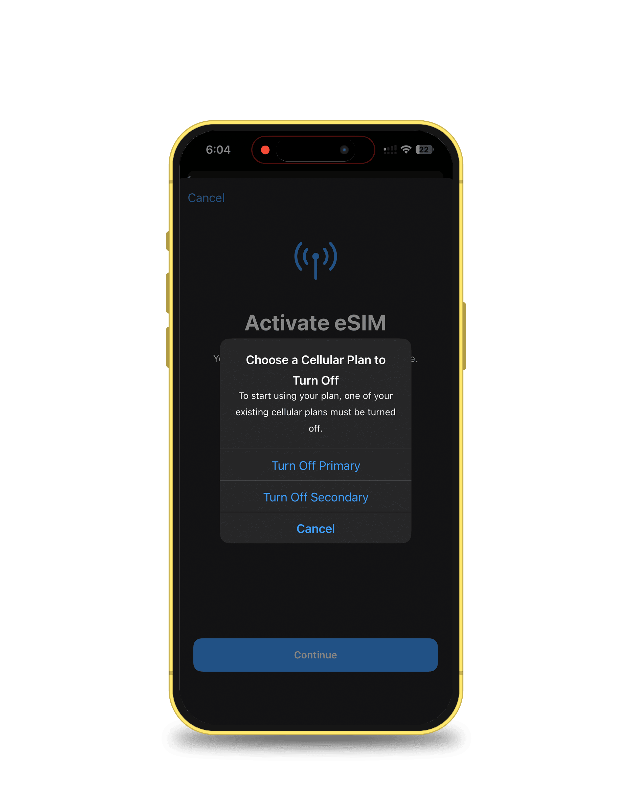
- A Pop-Up Will Ask Which Plan to Turn Off. Tap Turn Off Primary.
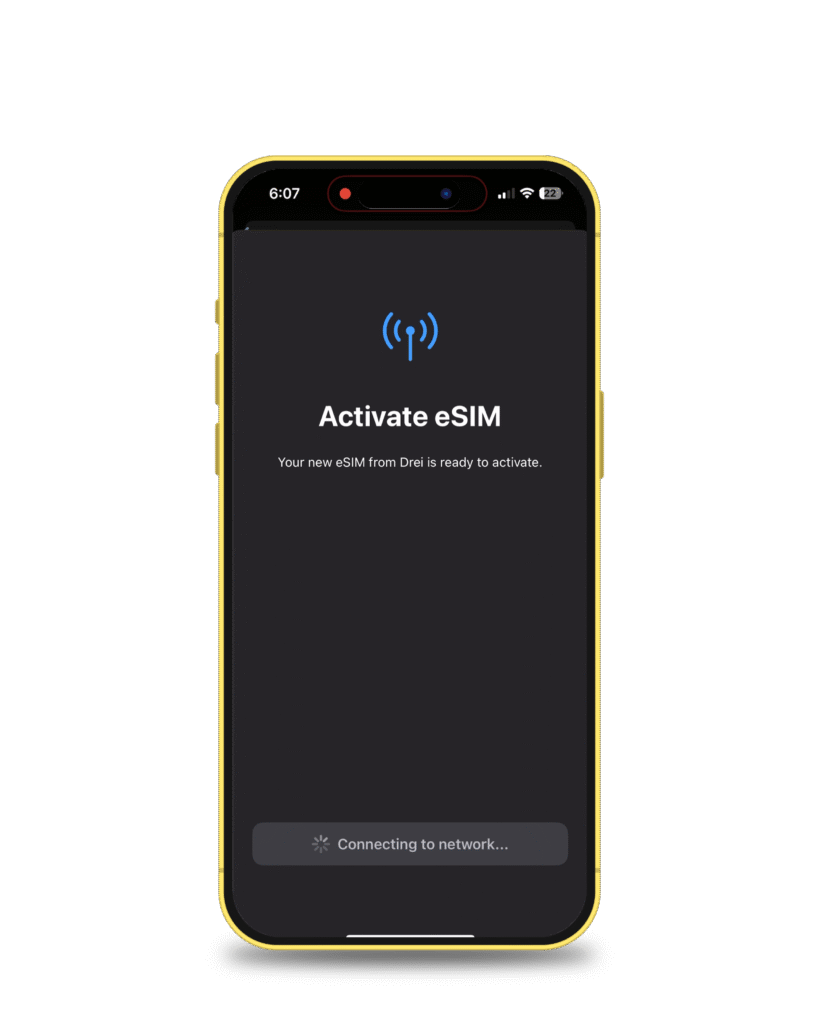
- Your iPhone screen says Activate eSIM, tap Continue.
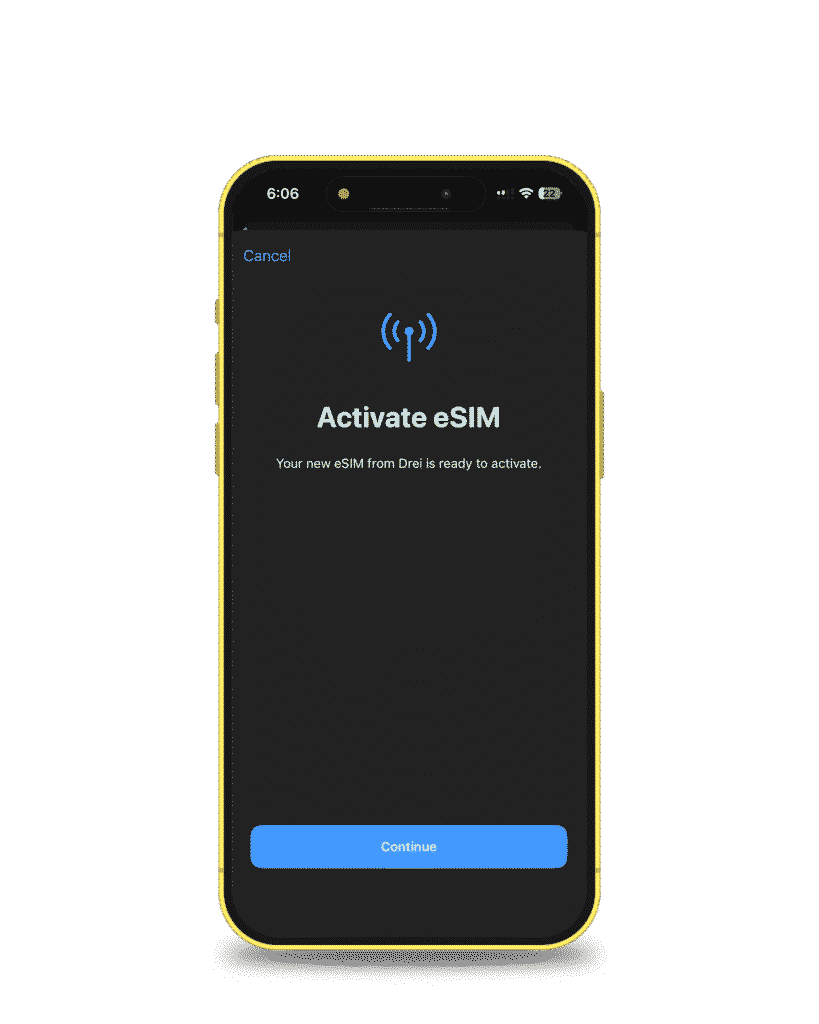
- Wait a few more seconds.
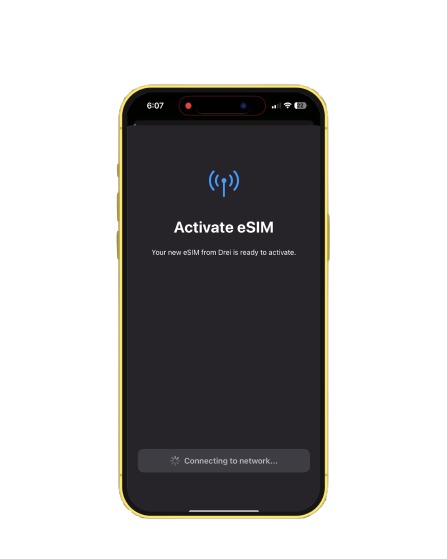
- Confirm Cellular Setup
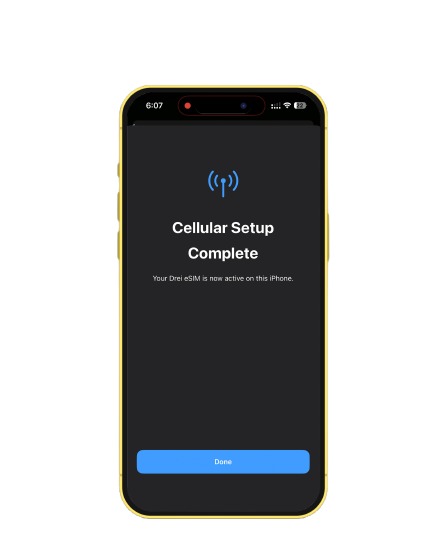
Your iPhone will tell you: Cellular Setup Complete. Tap Done. That’s your sign that everything is working behind the scenes.
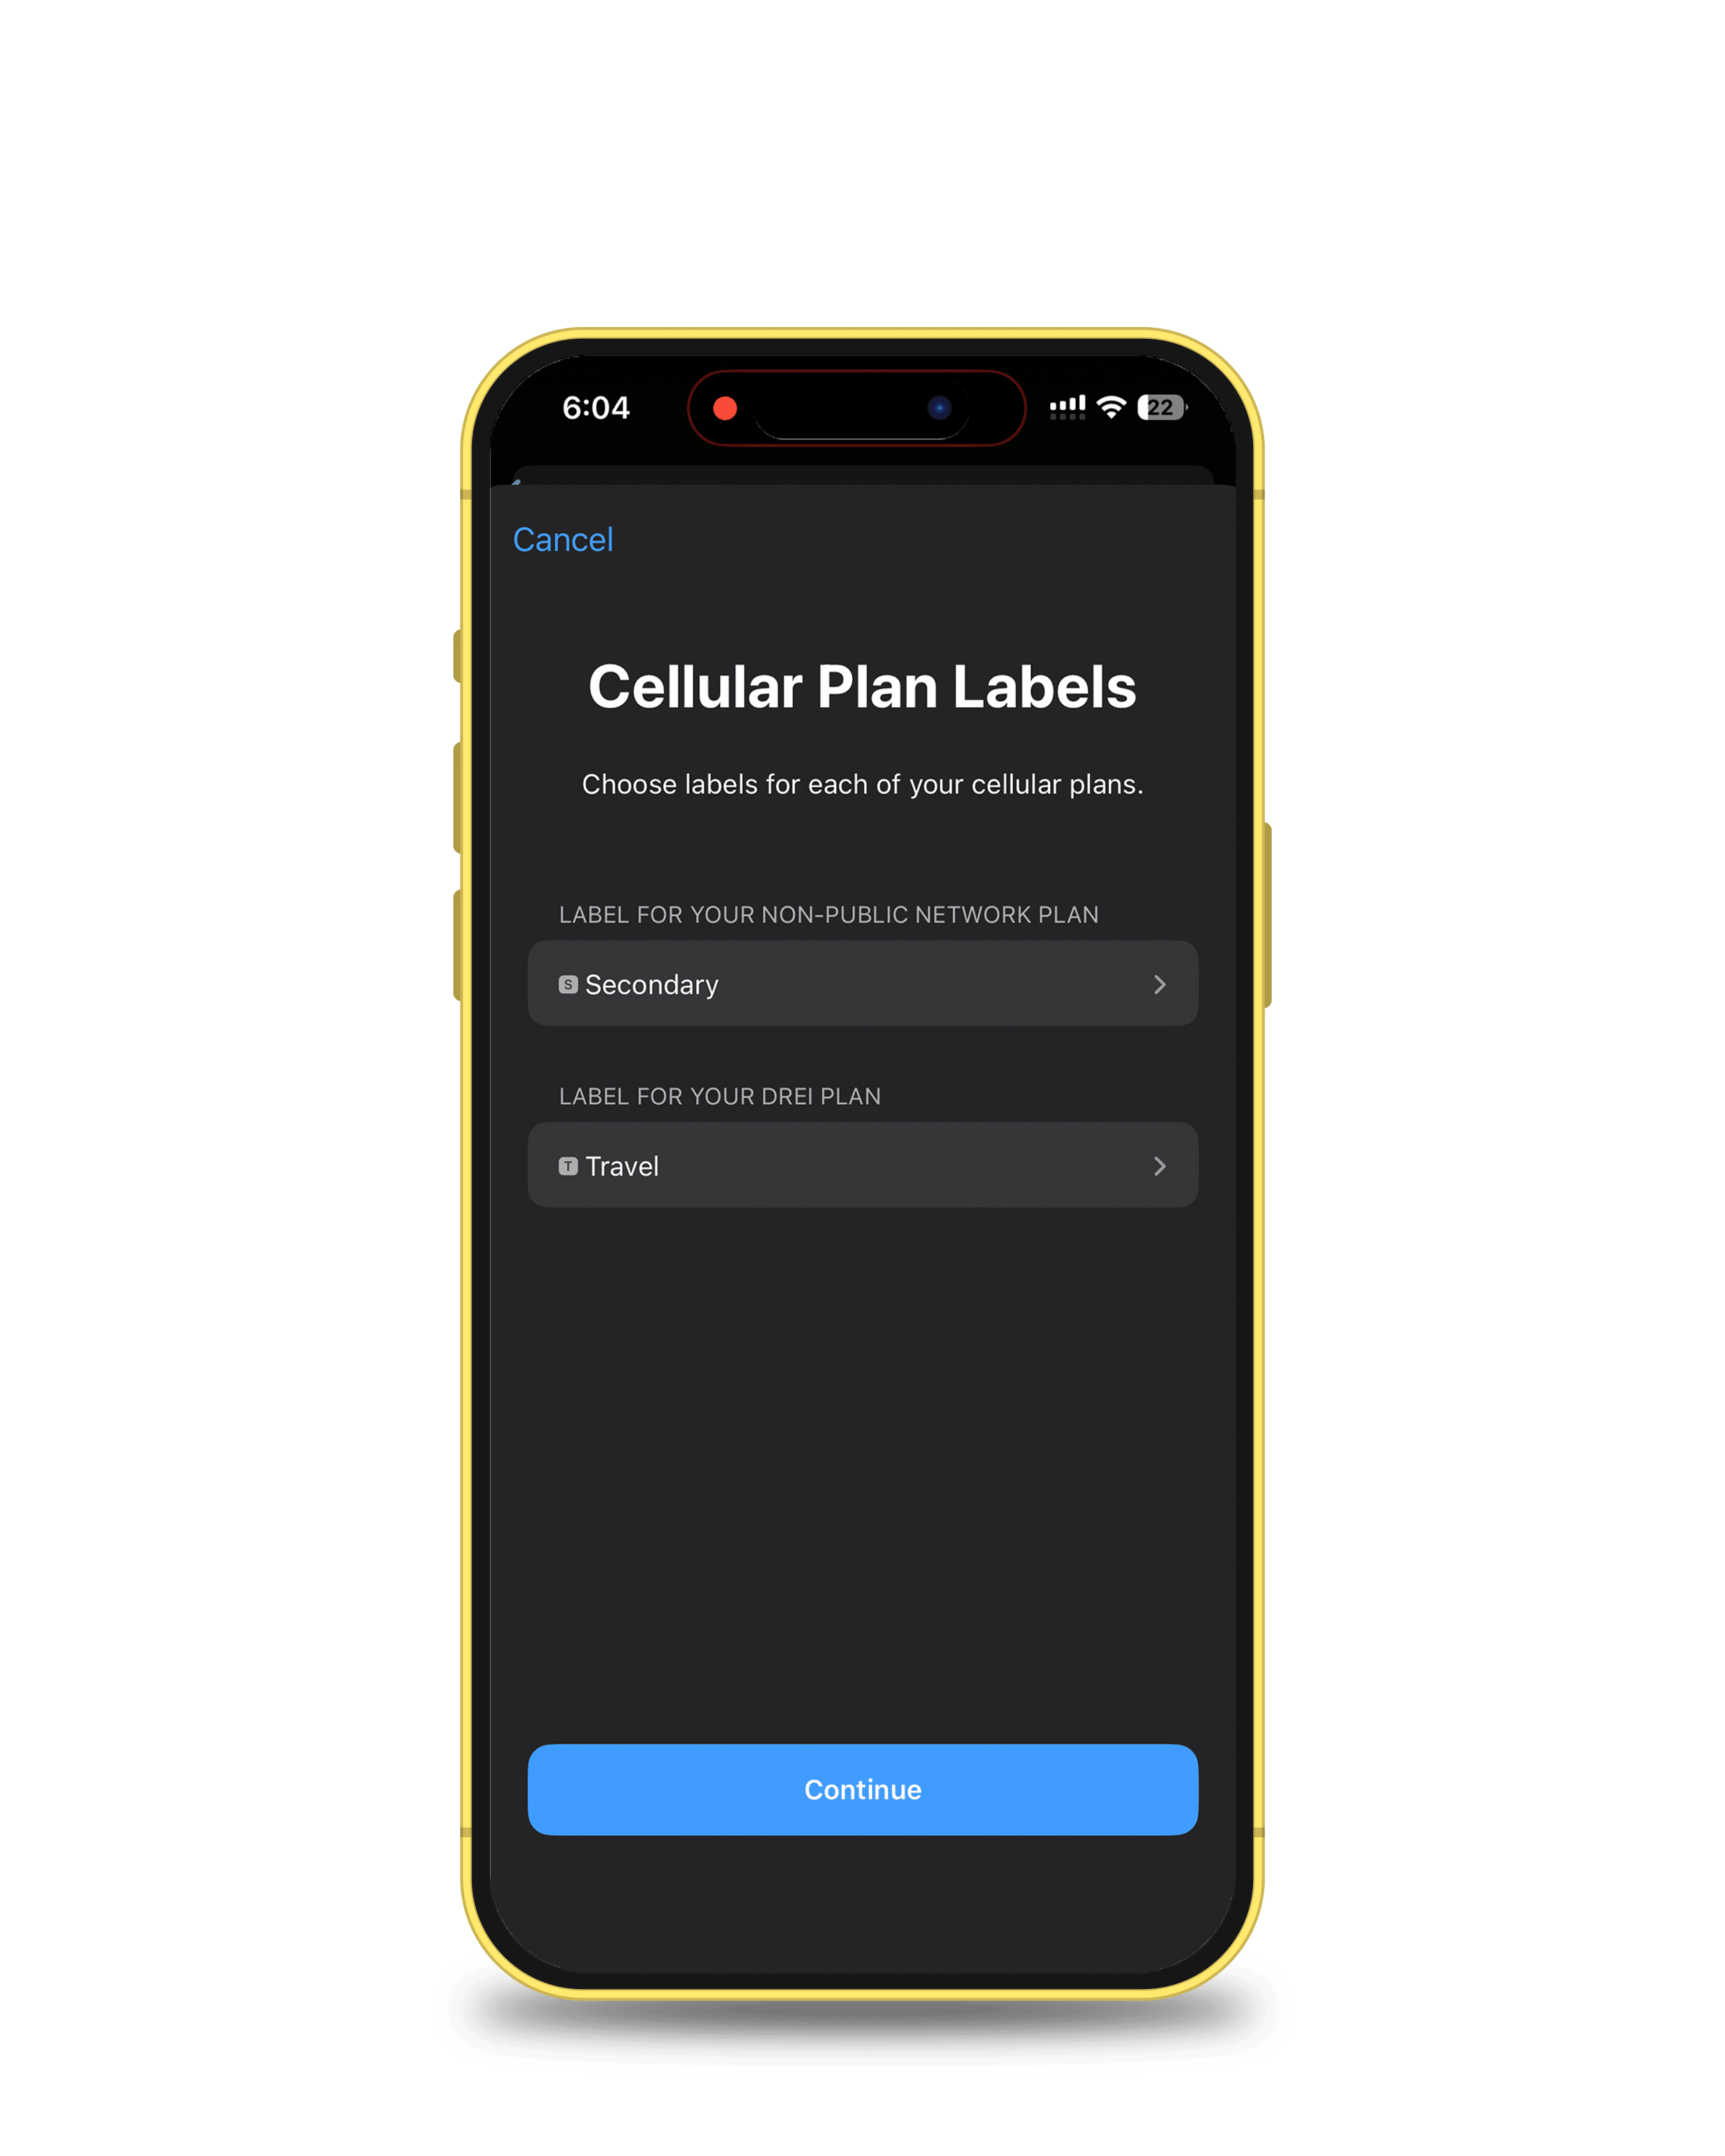
- Label Your New eSIM
![]()
![]()
![]()
iPhone will ask you to label the line. Tap Travel and rename it to something like SlickeSIM. Trust me, when you’re juggling multiple lines, you’ll want clear names. Tap Continue.
- Set Up iMessage and FaceTime
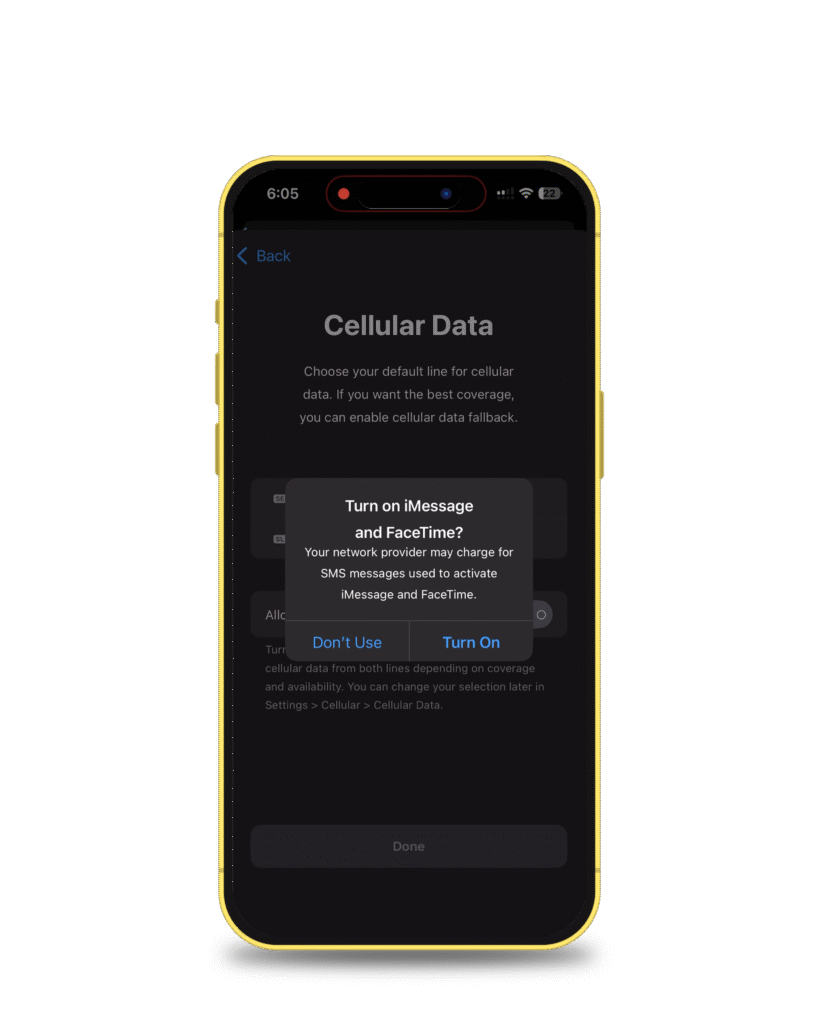
You’ll be asked which number to use for iMessage and FaceTime. Since Slick is for travel data, choose Don’t Use. Keep your main number tied to iMessage.
- Pick Your Default Line for Data
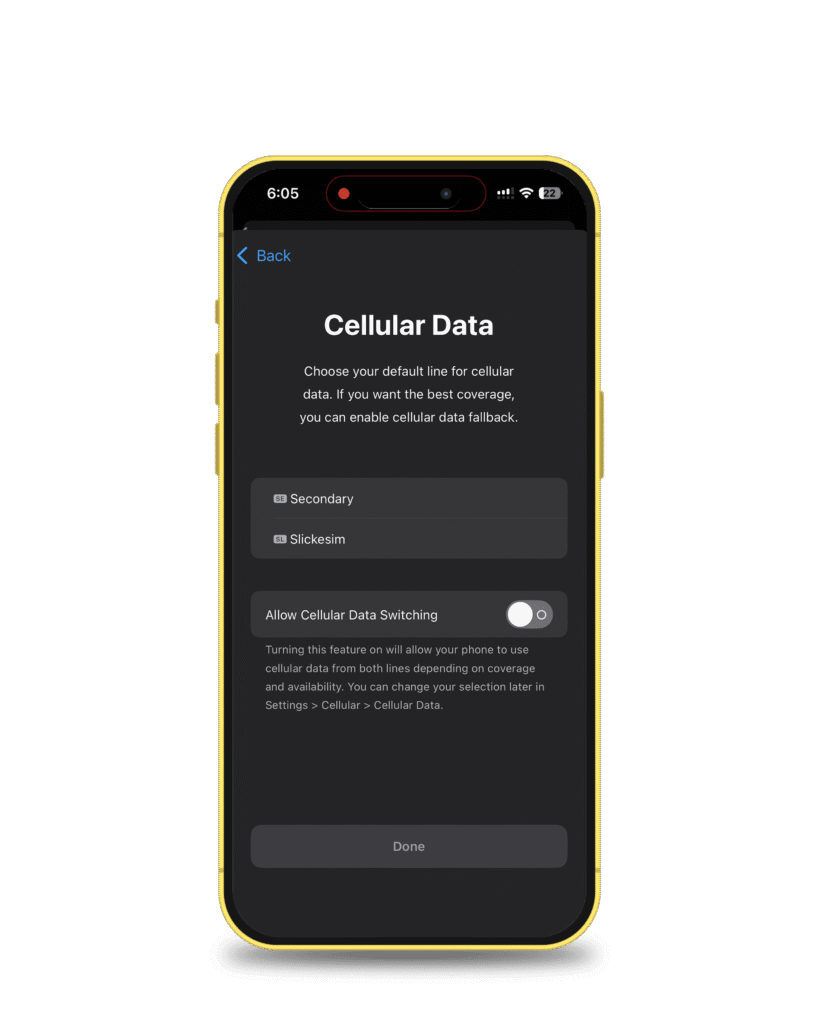
Your iPhone now asks: Which line should handle cellular data? Tap SlickeSIM.
2 – Tap Done.
- Set Preferred Line for Contacts
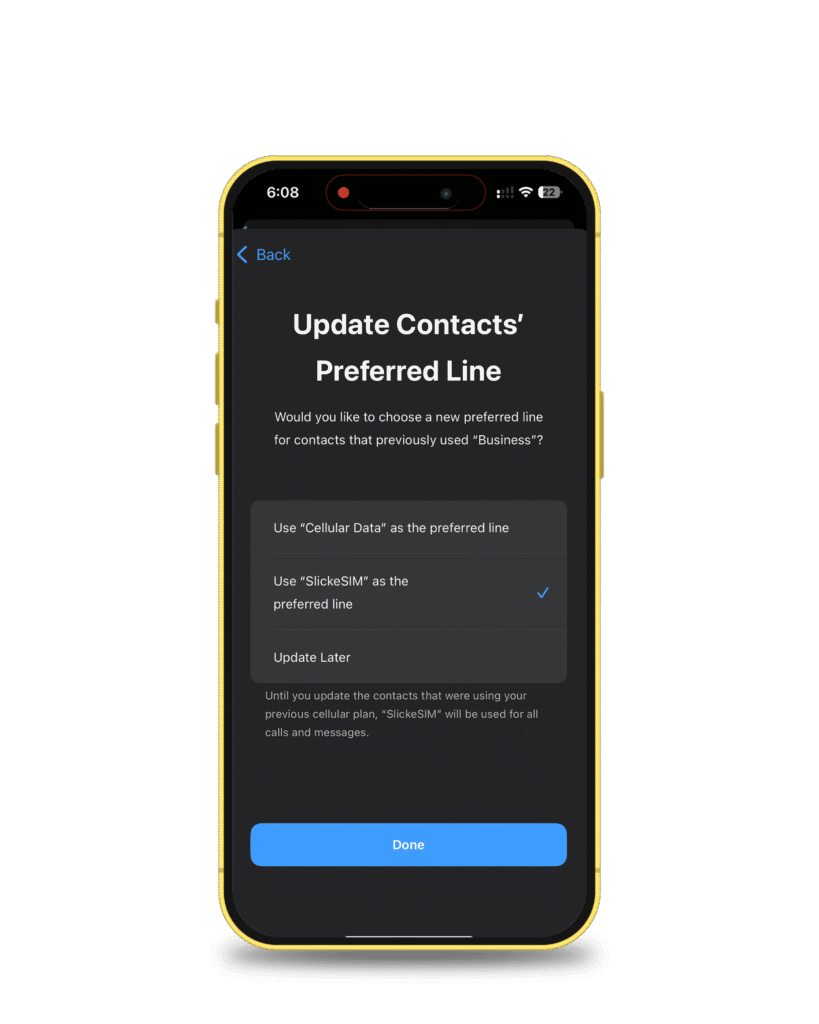
Next, you’ll see: Do you want to choose a new preferred line for contacts?
Select Use SlickeSIM as the preferred line and tap Done.
Step 3: Activate the SlickeSIM on Your iPhone

1 – Enable Your eSIM
To fully activate, tap on SlickeSIM (listed under SIMs).
Toggle ON Turn On This Line.
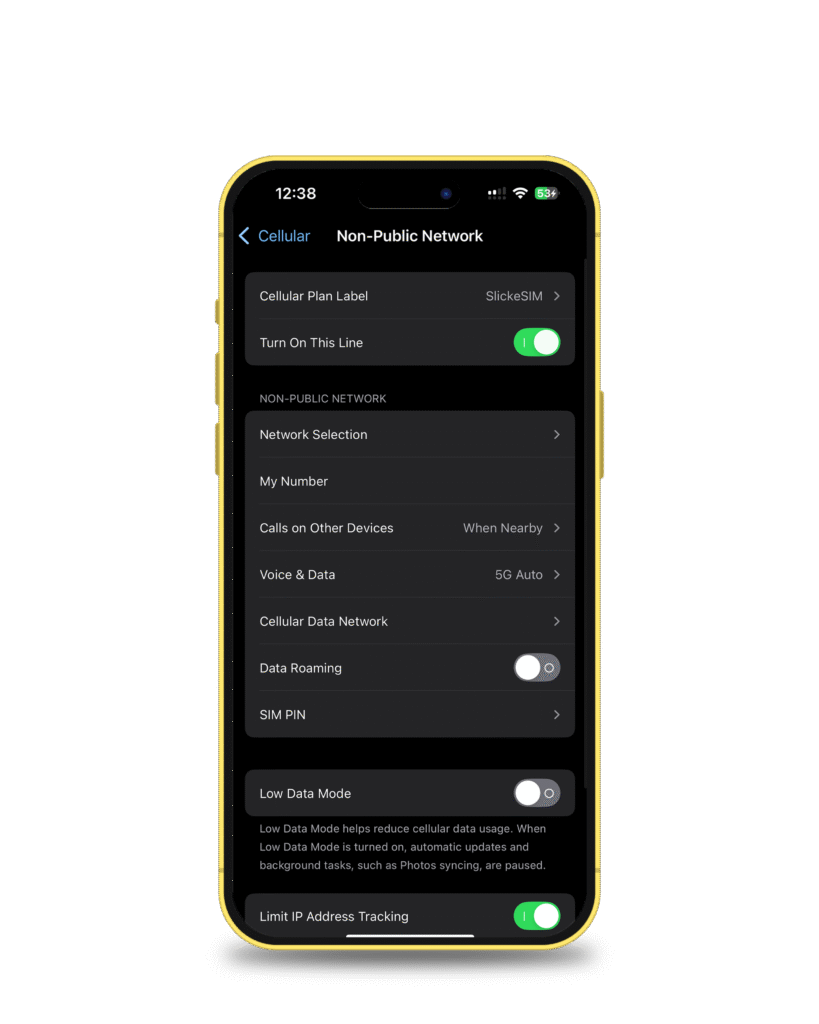
2 – Turn On Data Roaming

On the same screen, toggle Data Roaming ON so you can use the internet while abroad.
Automatic Activation Abroad
Here’s the beauty of SlickeSIM: once you’ve installed it, you don’t need to lift a finger. The moment your flight touches down and you switch off airplane mode, your SlickeSIM will automatically activate. No extra setup to activate an eSIM on iPhone. No hidden roaming steps. Just instant internet the second you land.
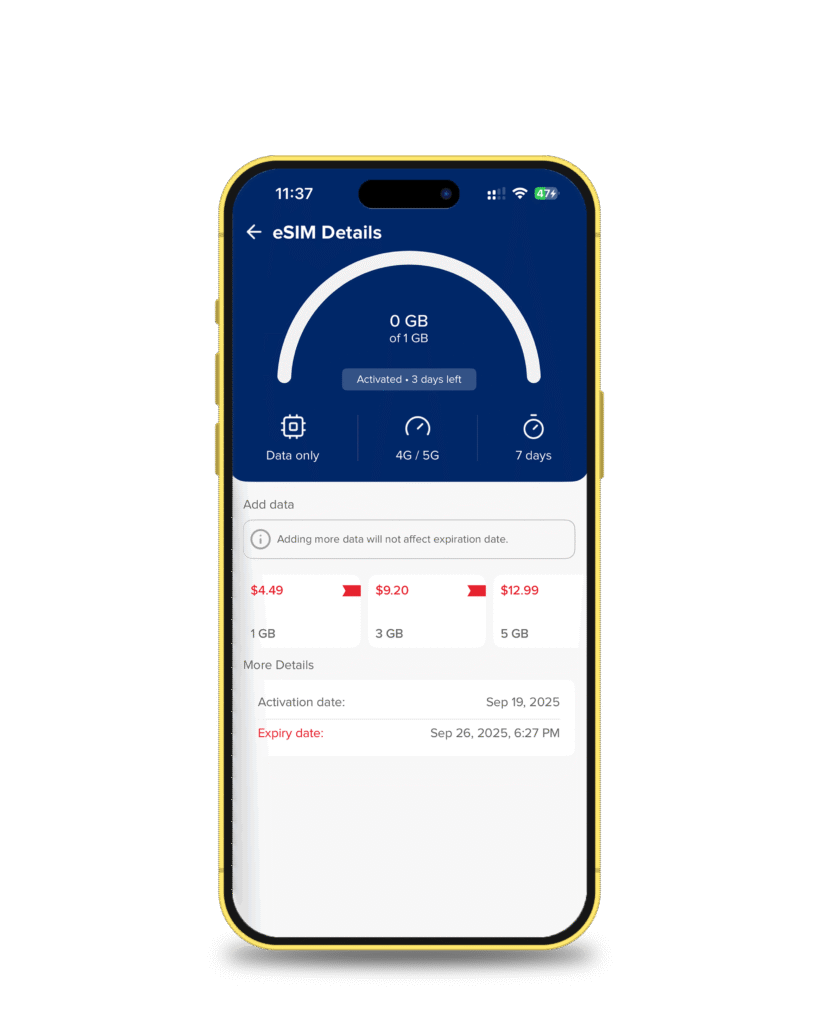
Real-Time Data Tracking
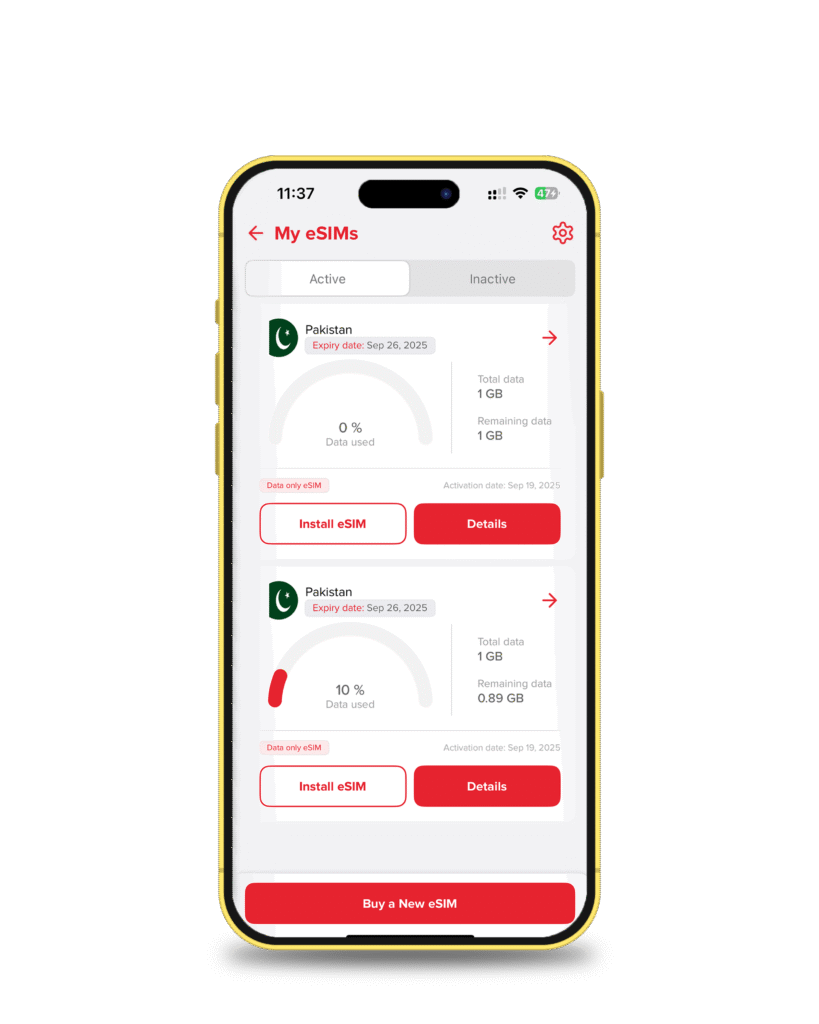
Want to know exactly how much data you’ve used or how much is left? Head back into the Slick app, tap on eSIM.
Then select Details. Here you’ll see a live dashboard of your data usage.
Wrapping It Up
Here’s the truth: to activate an eSIM on iPhone, you shouldn’t feel like wrestling with tech. It should feel effortless. With Slick, it is effortless. You have clear, easy options: direct install or QR code. Pick whichever feels right, and in just a few taps, you are online and ready to go. No fumbling. No panic. Just a smooth, seamless setup. So when your suitcase is zipped and you are heading for the airport, remember this: your phone no longer depends on a tiny plastic SIM card to keep you connected. All it needs is SlickeSIM.
Because staying connected is not only about data. It is about peace of mind, freedom, and making sure you never miss the moments that matter.
Frequently Asked Questions
i
Does the iPhone support eSIM?
Yes, the iPhone fully supports eSIM. In fact, Apple has made eSIM the standard on newer iPhone models, so you can add multiple eSIM plans without needing a physical SIM card.
i How do I activate eSIM on my iPhone?
Open the Slick app, choose your country and plan, complete the payment, then tap Install eSIM. You can install it directly or by scanning a QR code. Follow the on-screen instructions to finish activation.
i
Why is my eSIM not working on my iPhone?
Common reasons include: your phone not being connected to Wi-Fi during installation, data roaming being turned off, or the eSIM not being enabled in Settings. Double-check under Settings > Cellular > SIMs and toggle on your SlickeSIM.
i How to activate eSIM on iPhone from a QR code?
In the Slick app, tap QR Code to display your unique code. Print it or open it on another device, then on your iPhone, go to Settings > Cellular > Add eSIM > Use QR Code and scan it to activate.